Summary
This page describes how to set up Live Mail on Windows 10.
Live Mail is the default e-mail App that comes with Windows 10.
You will need your e-mail address and its password.
Details
Start Live Mail - This example assumes Live Mail
Version V17.9226.21295.0 and
that you are creating an additional e-mail address of
demo.user@demo.hcidata.com which is hosted by HCI Data Ltd.
-
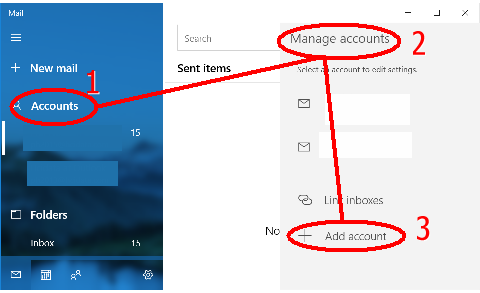
Display the "Add an account" panel by tapping/clicking the "Accounts" which displays the "Manage accounts" panel
then tap/click the "+ Add account" text.
-
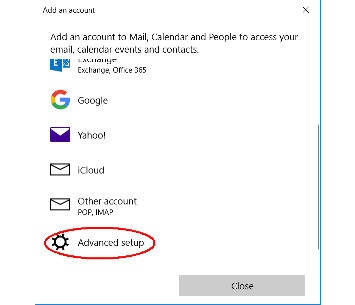
Tap/click "Advanced set-up"
-
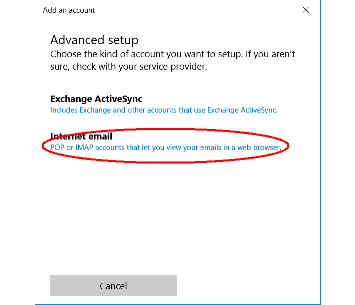
In the "Internet email" section;
tap/click "POP or IMAP accounts that let you view your emails in a web browser"
-
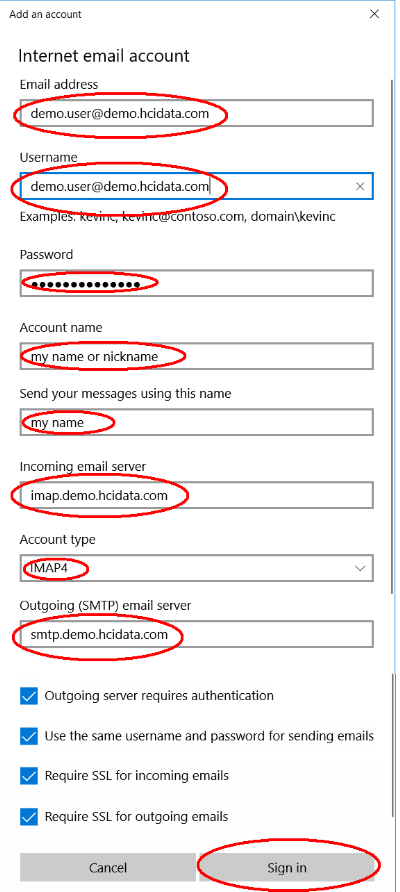 Complete the following fields (you will have to scroll down the "Add an account" window to see all the fields)
- Email address
- This is your email address supplied by the person who set up your email mailbox
- Username
- This MUST match your email address
- Password
- This is the password supplied by the person who set up your email mailbox
- Account name
- This is the name that will appear in LiveMail as your LiveMail account name
- Send you messages using this name
- This is the name recipients of your emails will see and is usually your name and/or job title
- Incoming email server
- This must be imap followed by the part of your email address after the "@"
- Account type
- Choose IMAP from the pull down list
- Outgoing (SMTP) email server
- This must be smtp followed by the part of your email address after the "@"
Ensure that the next four options have a tick in each box
then tap/click the "Sign in" button but if emails seem to get stuck in the Outbox, remove the tick from the 4th option ("SSL for outgoing emails")
-
You should see something similar to the following image
where the email address of
demo.user@demo.hcidata.com
has been created and is known as
LiveMail's "my name or nickname" account.
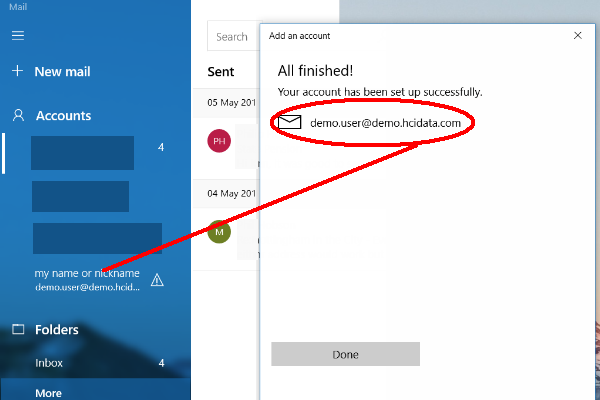
Tap/click the "Done" button
If you are using a shared server - and most of HCI Data Ltd's clients do -
then it is highly likely that you will have a warning triange against the
new account.
This warning needs fixing.
-
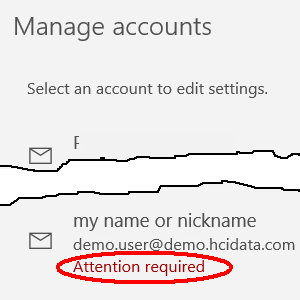 On the right you should see the
"Manage accounts" window
with "Attention required" for the new account.
On the right you should see the
"Manage accounts" window
with "Attention required" for the new account.
Tap/click on the new account and a option to "Fix account" is displayed.
Tap/click on "Fix account".
-
You should then see the following window.
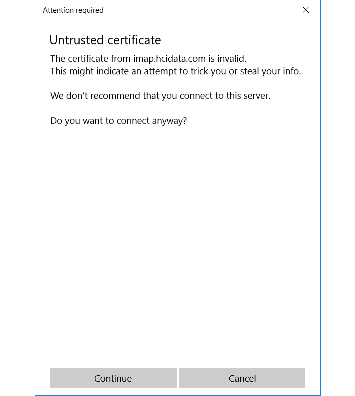
Tap/click the "Continue" button.
You may get some error messages but these should stop after about 5 minutes.
|