Summary
This page describes how to set up Outlook Express so that you can send e-mails
from an alias e-mail address.
Some ISPs (e.g. BT) require that you register the alias e-mail address before you can use it to send out e-mail.
It is a three stage process.
- First get some information from an existing e-mail account
- Create a new e-mail account
- Fine tune the new e-mail accont
Details
Start Outlook Express - This example assumes Outlook Express Version V5 and
that you are creating an e-mail address of me23@parishplan.org.uk.
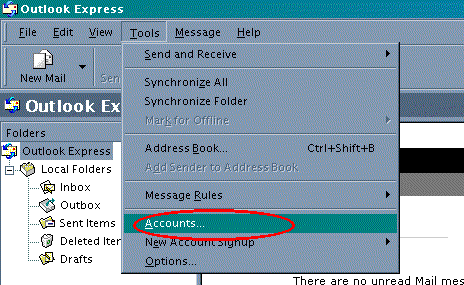
- Select the "Tools" pull down menu
- Select the "Accounts...." menu item
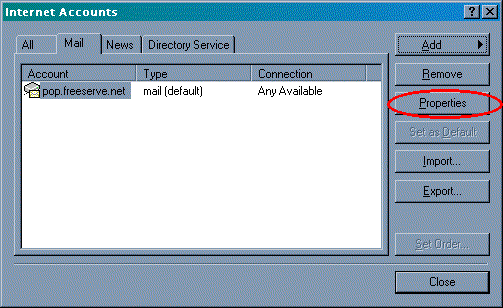
- We will now find out some information about an existing e-mail account
that will be used to create a new e-mail account.
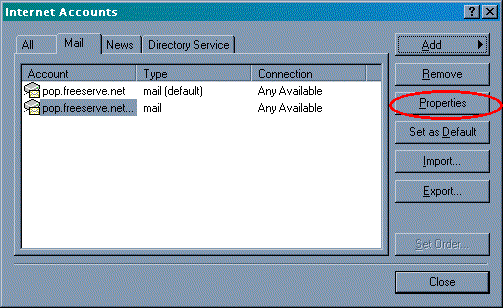
- Click on the "Mail" tab

- Click on the "Properties" Button
- Click the Servers tab
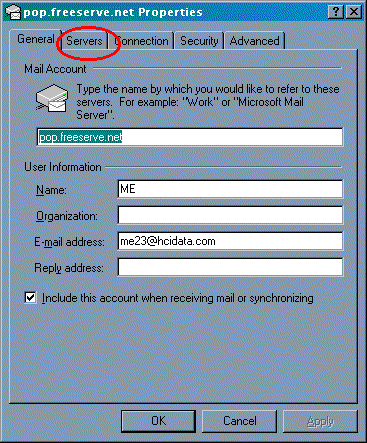
- Make a note of:
- My incomming mail server
- Incomming mail
- Outgoing mail Account
- Name
- Password - you should have written this down somewhere safe
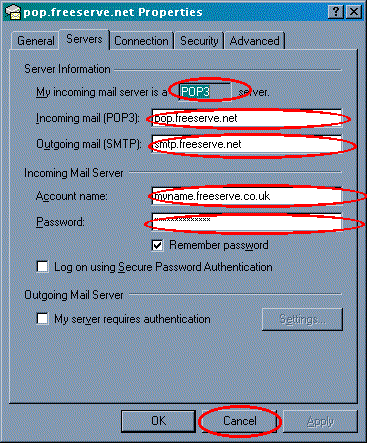
- Click the 'Cancel' button
- Click the Add button and select Mail

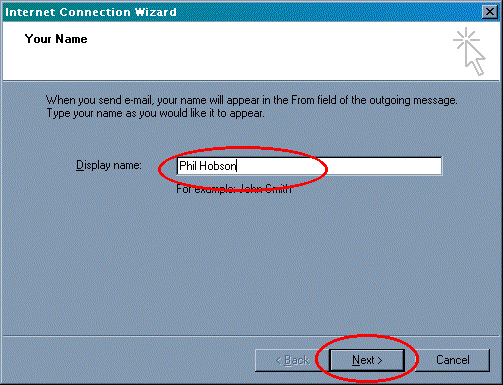
- Enter your name and then click the Next button
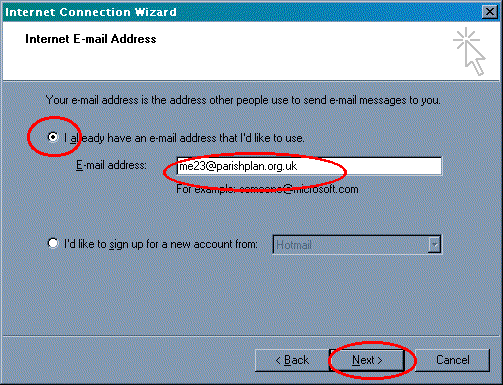
- Ensure that the "I already have an e-mail address.." is selected, type in
your new e-mail address and click the Next button.
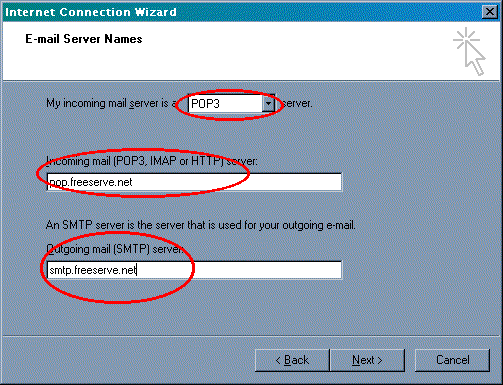
- Enter the mail server information that you collected before then click the
Next button
- Enter the account information that you collected before then click the Next
button
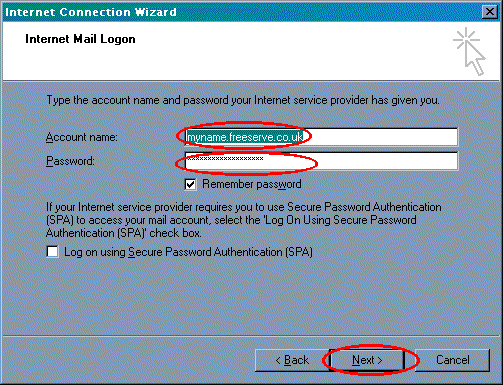
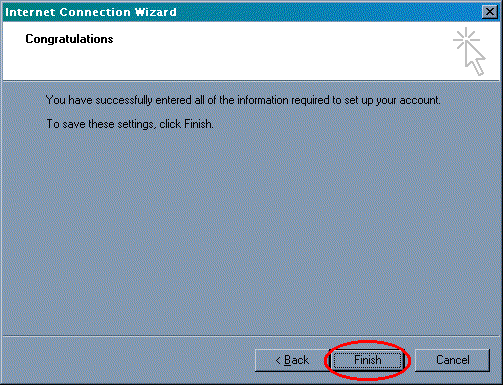
- Click the Finish button
- Although most properties of the new account have been set up, we need to
make a few changes to them. Click on the "Properties" Button
- Change the mail account name to "Parish Plan mail" and change the organisation
to "Shoreham Parish Plan Group"

Click the Servers tab
- Click the "My server requires authentication" box until a tick appears
in it.
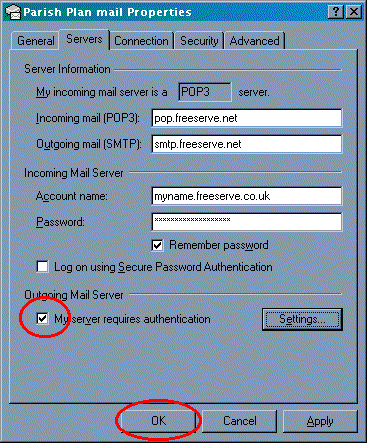
Click the OK button.
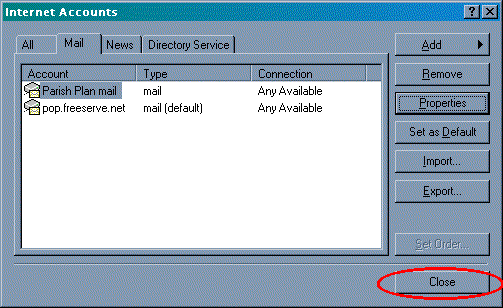
- Click the Close button
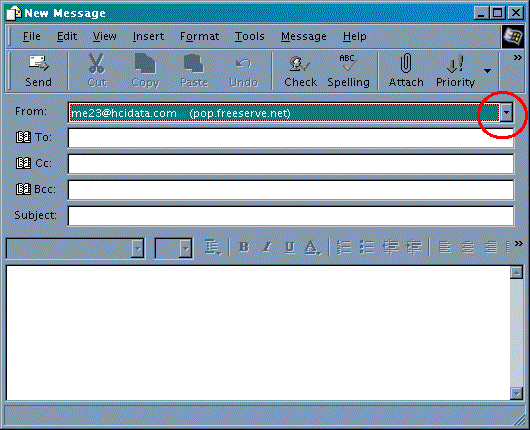
- When sending an e-mail, click the down arrow on the From line
- Select the line that says "(Parish Plan mail)"
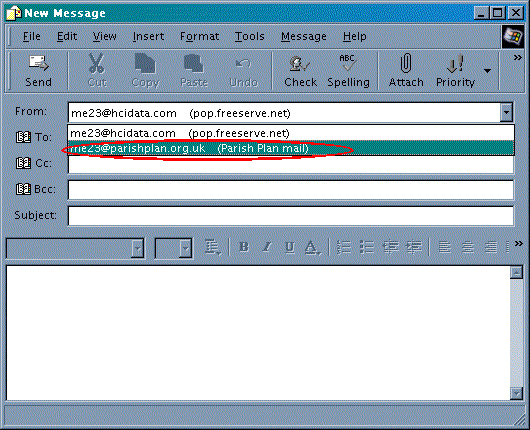
- Fill in the rest of the e-mail as usual.
Click the "File" tab
Click "Account Setting"
Server Information:
Account type:POP3
Incoming mail server:pop3.belpertowncouncil.gov.uk
Outgoing mail server:smtp.belpertowncouncil.gov.uk/
Logon Information:
User Name: FULL EMAIL ADDRESS (e.g. fred@belpertowncouncil.gov.uk)
Password : Same as the web based password for that email address
Click "More Settings ...."
Click the "Outgoing Server" tab
Ensure there is a "tick" for "My outgoing server required authentication"
Ensure there is a "dot" for "Use same settings as my incoming mail server"
Click "OK"
Ensure there is NOT a "tick" in "Test Account Settings..."
Click "Next"
Click "Finish
|